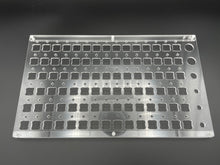
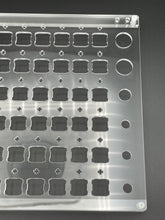
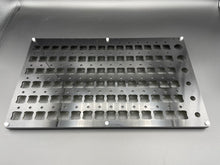
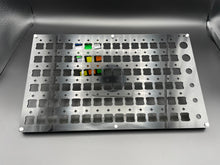
Back at RingerKeys with a new design featuring:
- a more ergo tool and lube cluster which can be built for left or right sided preference
- multi layer tweezer holder on top rail
- holes for brushes, vials, stem holders
- compact design for desk space
- spring well removed for bag lubing
- Dimensions 7.5x12.625" 19x32cm
This station ships as a kit, paper or clear plastic protective backing attached, and nylon nuts and bolts.
If your kit appears cloudy or even scorched in places, it is only on the protective film. It will be crystal clear once peeled off. Other orders from my cutting service came with paper backing and it was far more obvious that it was present.
*switch parts not included
Instructions:
- Peel protective backing from both sides of all 5 acrylic parts
- align 2 risers with smaller tweezer holder holes below 2 larger holes near vial cluster
- fasten through all 3 layers with included nylon screws and hand tighten with included nylon nuts
- use remaining 2 risers without holes for the bottom side
- fasten in the same way as step 3.
- Make switches the way you like them and enjoy the build.
- share feedback regarding which lubes work the best for you at https://ringerkeys.com/discord

Everything below this line is for the older model, but being kept here for reference 11/06/2020:
Instructions:
1. Remove all paper backing from the top and bottom sides of all 5 pieces of acrylic, and caution a lot of small pieces of acrylic may fall out and can be thrown away.
2. Should be left with 1 large top piece, with cut outs to hold switches, 3 identical pieces (risers or feet) and 1 larger thin piece that will go under the 2 rectangles to become the bottom of the spring well. and 7 white nylon nuts and bolts
3. At the top, stack the 1 (of the 3 identical thin pieces) riser, then the larger bottom of spring well, then the top (with switch cutout) and place the 4 nuts and bolts to hold them together, 3 across the top and one at the base of the spring well, hand tight is fine.
4. At the bottom, stack 2 of the identical thing risers and the top (with switch holes) and line up the 3 nylon bolts and nuts to hold the 3 layers together.


